
Pruning
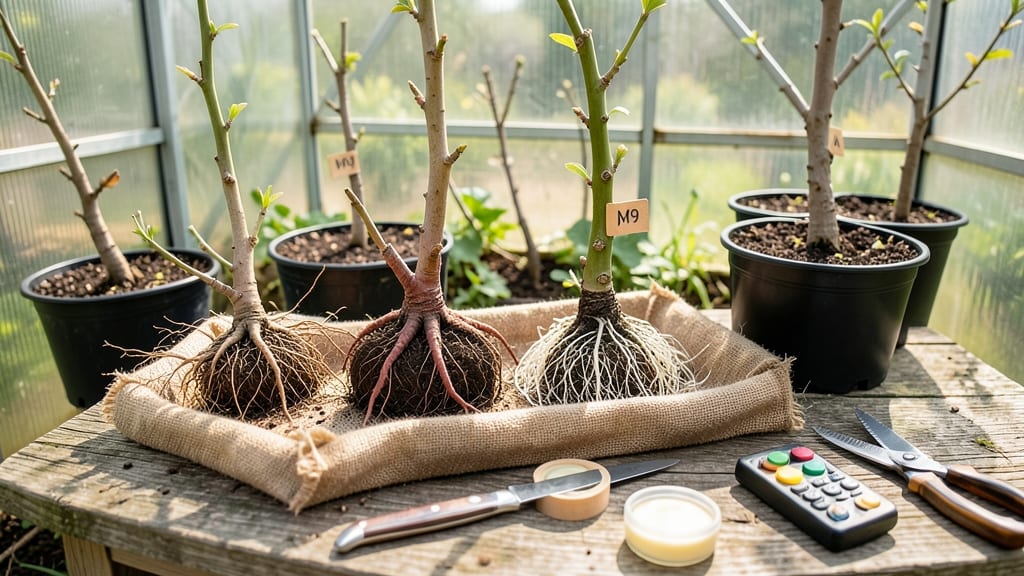
My first apple tree grew taller than my garage—until I learned about fruit tree rootstocks. 🌱 These underground powerhouses control everything above ground, letting you grow full-sized fruit on trees small enough for a suburban yard.
The right rootstock can turn a 20-foot monster into a 6-foot beauty that still produces bushels of fruit.
Rootstocks aren’t just about size—they affect flavor, cold hardiness, and even disease resistance. Dwarf rootstocks like M9 keep trees manageable, while semi-dwarf varieties strike a balance. The secret lies in matching your climate, soil, and desired fruit size to the right variety.
My M9 apple tree now produces more fruit than its giant predecessor ever did, all while staying neatly pruned.
You’ll end up with trees that bear fruit earlier, produce heavier harvests per square foot, and require less pruning. The best part? You can start with bare-root rootstocks in early spring or even graft onto existing trees to transform them.
Just pick the right variety for your zone, and you’re set for decades of low-maintenance fruit production.
Works for apples, citrus, stone fruits, and more—just check compatibility charts before planting. Here’s how to get started with the right rootstock for your space and climate.
📚 In This Guide
- What you need
- Instructions
- Tips and common mistakes
- Wrapping up and next steps
What you need
- ● Rootstock Varieties: Choose 3–5 dwarfing or semi-dwarfing rootstocks (e.g., M.9 for apples, B9 for peaches, or Citrange for citrus). Buy 1–2 bare-root plants per variety from a reputable nursery.
- ● Scion Wood: Purchase or propagate compatible scion wood (grafting material) from the same fruit tree species as your rootstock.
- ● Grafting Tools: Sharp grafting knife (budding or whip-and-tongue)
- ● Hand pruners (sterilized with rubbing alcohol)
- ● Grafting tape or parafilm
- ● Soil & Amendments: Well-draining potting mix or native soil (test pH: 6.0–7.0 for most fruit trees)
- ● Compost or worm castings (1–2 cups per planting hole)
- ● Slow-release fertilizer (balanced 10-10-10 or organic option)
- ● Protective Gear: Gloves (nitrile or leather for grip)
- ○ Pruning sealant (optional, for larger cuts)
- ● Rooting hormone (for propagating your own rootstocks)
- ● Plastic nursery pots (4–6" diameter, for seedling rootstocks)
- ● Shade cloth (to protect young grafts from harsh sun)
- ● pH test kit (to monitor soil acidity)
- ● Label markers (to track rootstock/scion pairings)
Step-by-step guide to selecting and grafting fruit tree rootstocks
Here’s how I’ve learned to transform backyard spaces into productive orchards using rootstocks—no guesswork, just proven techniques.
🌱 Step 1: Choose the Right Rootstock for Your Climate and Space
Rootstocks determine your tree’s size, disease resistance, and hardiness. For dwarf varieties, M.9 or B.9 work best in temperate zones, while semi-dwarf options like MM.109 suit colder climates. I always check the USDA hardiness zone rating—planting a peach rootstock rated for zones 5-9 in zone 4 will fail, no matter how well you graft.
Match your rootstock to your goals: dwarf for containers or small yards, semi-dwarf for easier harvests, and standard for long-term shade trees. For example, a B.9 rootstock keeps apples compact but needs staking, while MM.109 handles heavier fruit loads but grows taller. Skimping here means years of pruning headaches.
🪴 Step 2: Prepare Rootstocks and Scions for Grafting
Start with 1-year-old rootstocks (about pencil-thick) and scions (current season’s growth, 4-6 inches long). Clean all tools with 70% isopropyl alcohol—dirty blades spread disease faster than you can say “failed graft.” I shave the rootstock’s bark to expose smooth cambium (the green layer just under the bark) using a sharp grafting knife.
For scions, make a clean, slanted cut on one end, exposing the cambium layer. Store scions in a damp paper towel inside a sealed plastic bag in the fridge until grafting day—this keeps them hydrated without rotting. If scions wilt or dry out, even a perfect graft won’t take. Test by bending a scion slightly; it should snap crisply, not bend like overcooked spaghetti.
🌿 Step 3: Perform the Whip-and-Tongue Graft
Align the cambium layers of the rootstock and scion—this is the secret to successful grafts. I make a 1-inch vertical cut on the rootstock, then a tongue-shaped notch at the base. The scion’s cut matches the notch, creating a tight fit. Wrap the graft with rafting tape (not duct tape—it’s too harsh) and seal with grafting wax to lock in moisture.
Angle the scion slightly upward so water runs off, not pooling at the graft. Place the grafted rootstock in a shady, humid spot (like a greenhouse or under a plastic tent) for 4-6 weeks. Watch for new growth at the graft union—this is your signal it’s working. If the scion turns brown or mushy, the graft failed (usually from poor cambium alignment or disease).
✂️ Step 4: Care for Grafted Trees Post-Union
Once the graft takes (you’ll see 1-2 inches of new growth), remove the plastic covering and prune back the rootstock’s top to encourage the scion to grow. I use sterilized pruners to make clean cuts just above a bud, leaving 3-4 buds on the scion. This prevents the rootstock from competing with the scion for energy.
Water deeply once a week (unless it rains) to keep the soil evenly moist but not soggy. Too much water drowns roots; too little stresses the graft. After 6 months, the tree should have a thick trunk (about pencil-sized) and 5-6 strong branches. At this point, it’s ready for its permanent spot—whether that’s a pot, raised bed, or in-ground planting.
☀️ Step 5: Protect and Maintain for Long-Term Success
Young grafted trees need full sun (6+ hours daily) and protection from strong winds—their shallow roots can’t anchor yet. Stake if necessary, but don’t over-tighten; the tree should sway slightly in the breeze. I mulch with 2-3 inches of organic mulch (like wood chips) to retain moisture and regulate soil temperature.
Fertilize lightly in spring with a balanced 10-10-10 formula—too much nitrogen makes leaves grow fast but weakens the graft union. Watch for pests like aphids (they love tender new growth) and diseases like fire blight (blackened branches = emergency prune). A copper spray keeps fungal issues at bay, and neem oil handles pests without harming bees.
Tips & tricks for perfect fruit tree rootstock grafting
Here's what nobody tells you about making sure your grafting efforts actually take—and thrive.
Rootstock Selection Tip: When choosing between M.9 and MM.109 rootstocks, consider your fruit type. M.9 works beautifully for apples and pears but struggles with peaches—opt for MM.109 for stone fruits. I learned this the hard way after my peach grafts failed to thrive on M.9. Also, verify your local nursery carries rootstocks that match your USDA hardiness zone, or order online to avoid disappointment.
Scion Preparation Breakthrough: The secret to keeping scions fresh until grafting day is storing them in a sealed plastic bag with a damp paper towel wrapped around them. Place this in the fridge's crisper drawer where humidity is highest. I've had scions stay viable for up to 10 days this way—just check daily for any signs of wilting or mold. And remember, scions should snap crisply when bent, not bend like overcooked pasta.
Grafting Technique: For that perfect whip-and-tongue fit, shave your rootstock cut at a slight angle—about 15 degrees—using a sharp grafting knife. The cambium layer should be exposed and smooth, not jagged. I use a magnifying glass to verify alignment when joining scions, as even a tiny gap can prevent successful union. After wrapping with grafting tape, seal with wax immediately to lock in moisture and prevent drying.
Post-Graft Care Strategy: After those critical 4-6 weeks in the humid environment, don't be tempted to rush the removal of plastic coverings. Wait until you see 1-2 inches of new growth at the graft union, which typically takes 2-3 weeks after the initial 4-6 week period. This extra patience prevents shock to the young graft. Once uncovered, prune back the rootstock's top immediately to redirect all energy to the scion's growth.
Pro Tips for Fruit Tree Rootstocks
- Here's what nobody tells you about making sure your grafting efforts actually take—and thrive.
- Rootstock Selection Tip: When choosing between M.9 and MM.109 rootstocks, consider your fruit type.
- Scion Preparation Breakthrough: The secret to keeping scions fresh until grafting day is storing them in a sealed plastic bag with a damp paper towel wrapped around them.
Frequently asked questions
Got questions about fruit tree rootstocks?
You’re not alone! Here are answers to the most common ones to help you grow like a pro—even in tight spaces.
What’s the best rootstock for my space?
Dwarf rootstocks (like M.9 or B.9) are perfect for small yards, while semi-dwarf (e.g., MM.106) offers a balance. Standard rootstocks (e.g., Seedling) need more room but produce larger trees. Match your rootstock to your space and goals!
How long does it take for a grafted tree to bear fruit?
Patience pays off! Dwarf trees may fruit in 2–3 years, while standard rootstocks can take 4–6 years. Soil, care, and variety also play a role—so nurture your tree well for the best results!
Can I change rootstock on an existing tree?
Not easily—rootstock is set during grafting. If your tree’s struggling, focus on improving soil, pruning, or disease control instead. For new plantings, choose the right rootstock from the start!
Do dwarf rootstocks affect fruit size or quality?
Fruit size may be slightly smaller, but quality stays high! Dwarfing rootstocks prioritize earlier fruiting and easier management. Variety matters more—pick disease-resistant scions for the best harvest.
What if my graft union fails or splits?
Check for swelling, cracks, or weak growth above the graft. If it fails, the tree may revert to rootstock traits (e.g., larger but less manageable). Prune carefully and consult a local nursery for repairs or replacements.
Wrapping up and next steps
Choosing the right fruit tree rootstocks can transform your small garden into a productive paradise! 🌱 From dwarfing varieties that save space to semi-vigorous options balancing size and yield, the key is matching your goals—whether it’s early fruiting, disease resistance, or ease of care.
With the right tools and knowledge, you’re well on your way to bigger harvests in smaller spaces.
Ready to plant? Start by selecting rootstocks suited to your climate and fruit preferences, then source certified, healthy nursery stock. Your future orchard awaits—dig in and watch those trees thrive! 🌿