
Picking
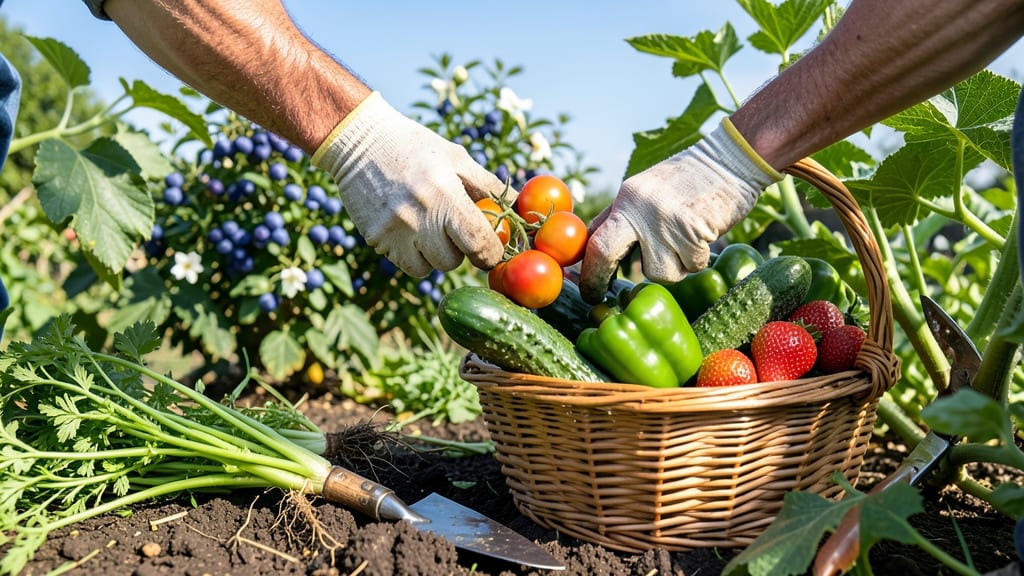
Harvesting fruit and veg at just the right moment turns a decent garden into a bounty. ✨ The difference between meal-worthy tomatoes and bland store-bought ones starts with knowing when to pick—before they overripen, split, or attract pests.
I’ve learned the hard way that waiting too long means losing flavor, texture, and even the harvest itself.
The tools you need are simpler than you think: sharp scissors or pruners for vines, a basket lined with fabric to prevent bruising, and a small knife for root vegetables.
Timing matters too—harvest in the morning when temps are cool, and always check the plant’s signals: color shifts, easy detachment, and that unmistakable scent of ripeness. Even berries have a "squeeze test" that tells you when they’re ready.
What you’ll end up with is produce that’s sweeter, firmer, and packed with flavor—exactly what you’d expect from a homegrown harvest.
Proper storage (cool, dark, and humid for most veggies; room temp for tomatoes) keeps them fresh for days, and a little post-harvest care (like curing squash or drying herbs) extends their shelf life even longer. The payoff? A kitchen stocked with homegrown goodness all season long.
This works for any garden size, from a balcony container to a full backyard plot. Whether you’re picking your first cucumber or your tenth bushel of tomatoes, these steps make the process foolproof—and the results undeniably rewarding. Let’s get those harvests in without the guesswork.
📚 In This Guide
- What you need
- Instructions
- Tips and common mistakes
- Wrapping up and next steps
What you need
- ● Harvesting shears or pruners: Sharp, bypass-style shears (e.g., Felco F-2) for clean cuts—1 pair (or 2 for large gardens).
- ● Gloves: Heavy-duty, gardening gloves (nitrile-coated for grip) to protect hands from thorns or rough skins—1–2 pairs.
- ● Harvest baskets/bins: Lightweight, ventilated baskets (10–15 gallons) or 5-gallon buckets with lids for storage.
- ○ Watering can or hose: Adjustable nozzle for rinsing off dirt—1 (optional but handy!).
- ● Harvest containers: Plastic crates (12"x18") for fragile produce (e.g., berries, tomatoes).
- ● Mesh bags (for onions, garlic, or herbs to air-dry).
- ○ Food-safe storage: Vacuum sealer (optional but extends shelf life for veggies).
- ● Paper towels or breathable cloth bags for humidity-sensitive produce (e.g., leafy greens).
- ● Cleaning supplies: Colander (stainless steel, 12–16").
- ● Baking soda (for soaking dirty produce) and vinegar spray (1:3 ratio for disinfecting).
- ● Know your harvest window: Research peak ripeness for your crops (e.g., tomatoes should be slightly soft when picked).
- ● Weather check: Harvest in the morning (cool temps preserve freshness). Avoid rain-soaked produce.
- ● Storage space: Designate a cool, dark area (50–55°F ideal) for short-term storage.
- ● Portable scale: For weighing produce before canning or selling.
- ● Harvest journal: Track yields, varieties, and tips for next season!
- ● Solar-powered clipper: For eco-friendly, long-lasting shears.
- ● Reusable silicone produce bags: Eco-friendly alternative to plastic.
How to harvest fruit and vegetables for maximum yield
Here's my no-fuss approach to harvesting that keeps plants producing all season long.
🌱 Step 1: Learn the Right Time for Each Crop
Harvesting at the perfect moment ensures peak flavor and encourages more production. For leafy greens like lettuce or spinach, pick when leaves reach 3-4 inches—this triggers new growth from the base. I always harvest outer leaves first, leaving the inner ones to keep growing. With tomatoes, wait until they're fully colored and slightly soft to the touch—this means they've reached full ripeness.
Root vegetables like carrots or beets are ready when you can see their shoulders above the soil. Gently brush away dirt to check size—most are perfect when they reach 1-2 inches in diameter. The key is consistency: check your plants every 2-3 days during peak growing seasons to catch them at their best.
☀️ Step 2: Use the Proper Technique for Each Type
How you harvest matters just as much as when you do it. For fruits like tomatoes or peppers, I always twist gently until they release from the vine—this prevents damage to the plant. If you need to cut, use clean pruners and leave a small stem attached to help the fruit ripen evenly. With leafy greens, snip just above a leaf node (where new leaves grow) to encourage bushier growth.
For root crops, use a fork or trowel to loosen the soil around the edges before pulling gently. Never yank—this can tear roots or leave parts in the ground. I always water the soil thoroughly the day before harvesting root veggies; this makes them easier to pull and less likely to break. Handle all produce gently to avoid bruising, which shortens shelf life.
✂️ Step 3: Harvest Regularly to Encourage More Production
Most home gardeners make the mistake of harvesting too little or too late. I harvest zucchini and cucumbers every 2-3 days once they reach 6-8 inches—this prevents the plant from shutting down production. The same goes for beans: pick them when pods are firm but still tender, and the plant will keep flowering and producing.
For fruits like strawberries, I harvest every morning during peak season. The berries ripen fastest in the sun, so morning harvests mean you're getting the sweetest, most flavorful fruit. After harvesting, I always rinse produce gently under cool water and pat dry with a clean towel—this removes dirt and extends freshness.
🌿 Step 4: Store and Preserve for Long-Term Enjoyment
Proper storage keeps your harvest fresh longer. Leafy greens like kale or spinach should be stored in a plastic bag with a paper towel to absorb moisture—this keeps them crisp for up to 2 weeks in the fridge. Root vegetables like carrots or potatoes do best in a cool, dark place with good airflow, like a root cellar or even a cardboard box in your pantry.
For fruits that ripen after picking, like avocados or bananas, I store them separately from other produce to avoid speeding up the ripening process. Tomatoes and peppers can be stored at room temperature until fully ripe, then moved to the fridge to extend their life. I also freeze excess produce like berries or herbs in ice cube trays for easy, portion-sized use later in the year.
⏰ Step 5: Plan for Seasonal Shifts and Succession Planting
As seasons change, so do your harvesting needs. In early spring, I focus on harvesting overwintered crops like kale or carrots, while summer brings a bounty of tomatoes, peppers, and zucchini. I always make notes on what thrives in my garden and what doesn't—this helps me plan better for next year.
Succession planting is my secret to a never-ending harvest. After harvesting early crops like lettuce or radishes, I replant with quick-growing varieties like bush beans or spinach. This keeps my garden productive from spring through fall without gaps. I also save seeds from my best-performing plants to ensure I have the varieties I love for next season.
Tips & tricks for perfect season-long harvesting
Here's what nobody tells you about keeping your garden productive all season—without the overwhelm.
The Timing Secret: Morning is your best friend for harvesting. Most fruits and vegetables are at their peak flavor and firmness first thing in the morning after the dew has dried. I harvest strawberries and tomatoes within an hour of sunrise—they're sweeter and hold up better for storage. For leafy greens, wait until the heat of the day has passed to avoid wilting.
Tool Intelligence: Invest in a small hand fork and a pair of clean pruners—they're game-changers for different crops. Use the fork for root vegetables to loosen soil without damaging the roots, and keep those pruners sharp for clean cuts on stems. I also keep a small bucket of water nearby to rinse produce immediately after harvesting, which prevents bruising and keeps everything fresh longer.
Seasonal Strategy: Don't let your garden go dormant between seasons. In early spring, harvest overwintered crops like kale or carrots while they're still tender. Then transition to warm-season plants like tomatoes and peppers by clearing space and replanting. I always keep a small notebook to track what I harvest each week—this helps me plan succession plantings and avoid gaps in production.
Preservation Wisdom: The 2-week fridge life for leafy greens? That's only if you store them right. Wrap greens loosely in a paper towel first to absorb moisture, then place them in a plastic bag with a few small holes for airflow. For root vegetables, store them in a cardboard box with slightly damp sand—they'll keep for months this way. I also freeze excess berries in single layers on a tray before bagging, which prevents clumping.
Pro Tips for Harvest Fruit And Veg
- Here's what nobody tells you about keeping your garden productive all season—without the overwhelm.
- The Timing Secret: Morning is your best friend for harvesting. Most fruits and vegetables are at their peak flavor an...
- Tool Intelligence: Invest in a small hand fork and a pair of clean pruners—they're game-changers for different crops....
Frequently asked questions
Got questions about harvesting your fruit and veg? You’re not alone! Here are some of the most common queries—and their straightforward answers—to help you make the most of your homegrown bounty.
When is the best time to harvest fruit and vegetables?
The ideal time depends on the crop! For vegetables, harvest when they’re firm, vibrant, and at their peak size (e.g., tomatoes when fully colored, zucchini when 6–8 inches long). For fruit, pick when it separates easily from the vine (like berries) or reaches full maturity (e.g., apples when they yield slightly to gentle pressure). Always check seed packets or plant tags for specifics!
How do I know if my produce is overripe or underripe?
Overripe produce often shows soft spots, mold, or a strong, fermented smell. Underripe items may still be hard, bland, or lack color. For example, peaches should give slightly when gently squeezed, while cucumbers should be firm but not rock-hard. When in doubt, taste a small piece—your palate is your best guide!
Can I harvest fruit and veg at night? Does it affect quality?
Harvesting during cool morning hours (right after dew evaporates) is ideal because produce is crispest and retains moisture longer. However, you can harvest anytime if needed—just handle gently to avoid bruising. Avoid harvesting after heavy rain, as wet produce spoils faster and may harbor pests.
What should I do if my fruit or veg won’t ripen on the plant?
Some crops (like tomatoes, peppers, and avocados) need a little extra warmth to ripen. Try placing them in a paper bag with a banana or apple (ethylene gas speeds ripening) or move them to a sunny windowsill. For stubborn produce, check if the plant lacked sunlight, water, or nutrients—adjusting care next season can prevent future issues!
How do I store harvested fruit and veg to keep it fresh longer?
Storage tips vary by type:
- Leafy greens (spinach, lettuce): Wrap in a damp paper towel and store in a plastic bag in the fridge.
- Root veggies (carrots, potatoes): Keep in a cool, dark place (like a root cellar or crisper drawer) with good airflow.
- Berries: Rinse just before eating, then store dry in a single layer in the fridge.
- Tomatoes: Never refrigerate—store at room temp until ripe, then move to the fridge.
Most produce lasts 3–7 days in the fridge, but proper prep extends freshness!
Wrapping up and next steps
Harvesting your own fruit and veg isn’t just rewarding—it’s effortless once you know the tricks! With the right tools, seasonal timing, and a little patience, you’ll enjoy a bountiful garden all year long.
Whether you’re a beginner or a seasoned green thumb, the key is consistency and confidence—so don’t hesitate to start small and scale up.
Ready to reap the rewards? 🌱 Grab your gloves, check your garden’s needs, and begin harvesting today. Every bite of homegrown goodness is a step toward a fresher, healthier lifestyle—you’ve got this!