
Succulent
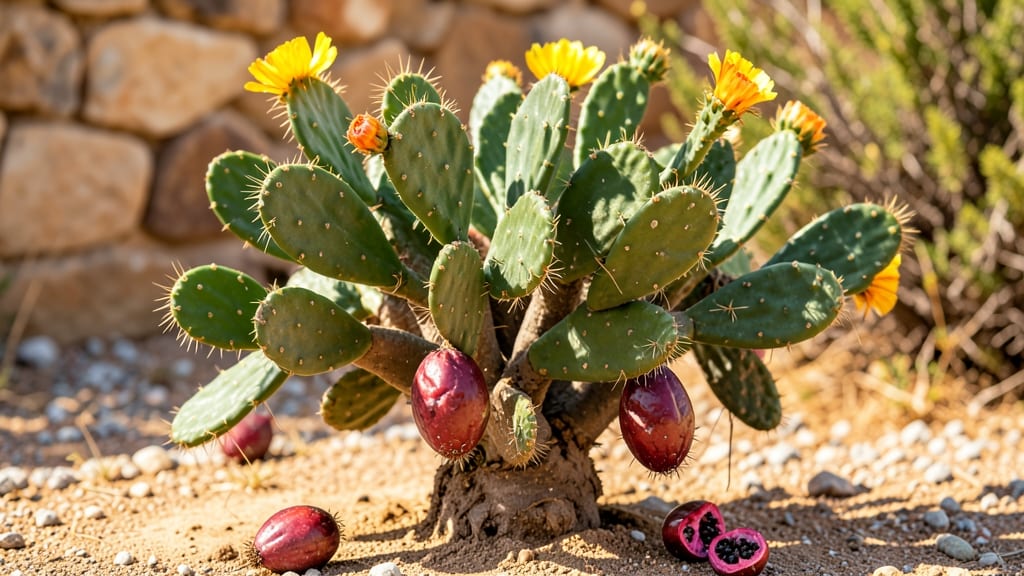
Growing Italian cactus fruit—those vibrant, sweet-tart pear-shaped gems—is simpler than you’d think. 🌵 I’ve grown Opuntia ficus-indica for years, and the key to success isn’t complicated: it’s about sunlight, well-draining soil, and patience. What starts as a prickly pad can turn into a fruit-bearing powerhouse with the right care.
The secret lies in mimicking its natural Mediterranean habitat. Plant in full sun with 6+ hours of direct light daily, and use a sandy, gravelly mix to prevent rot.
Water deeply but infrequently—think drought conditions, not soggy soil. Most gardeners overwater, which leads to mushy pads and fewer fruits. Once established, these cacti thrive on neglect.
By your second year, you’ll see those iconic yellow blooms followed by bright red or yellow fruit—each packed with vitamin C and a taste like a mix of pear and honey.
The harvest season stretches from late summer to fall, and with proper pruning, you’ll get bigger pads and more fruit each time. Even beginners can master this.
Troubleshooting is easy: pests like cactus moths? Handpick them. Poor fruit set? Ensure full sun and balanced watering. With these simple steps, you’ll go from prickly pads to a bountiful harvest—no green thumb required.
📚 In This Guide
- What you need
- Instructions
- Tips and common mistakes
- Wrapping up and next steps
What you need
- ● Cactus Pads (Pencas): 3–5 healthy, disease-free pads (6–12 inches long) from a mature prickly pear cactus.
- ● Well-Draining Soil: 5–10 lbs of a cactus/succulent mix (or blend 60% potting soil, 30% perlite, and 10% coarse sand).
- ● Containers or Garden Space: 3–5-gallon pots (with drainage holes) or
- ● A sunny, well-draining garden bed (full sun, 6+ hours/day).
- ● Fertilizer: Balanced, slow-release fertilizer (10-10-10 or 5-5-5) or organic options like composted manure.
- ● Watering Can or Hose: With a gentle spray nozzle to avoid damaging pads.
- ● Gloves (Thick Leather or Cactus-Safe): To protect hands from spines and glochids (tiny hair-like spines).
- ○ Pruning Shears or Knife: Sterilized for cutting pads (optional if planting whole pads).
- ○ Rooting Hormone: (Optional) To boost root growth when propagating from cuttings.
- ● Mulch (Gravel or Pebbles): To improve drainage and deter weeds.
- ● Support Stakes: For larger pads or young plants in windy areas.
- ○ pH Test Kit: To ensure soil pH is between 6.0–7.0 (optional but helpful).
Step-by-step instructions for cultivating Italian cactus fruit
Here's how I grow Italian prickly pears with minimal fuss—no green thumb required.
🌱 Step 1: Select and Prepare Your Cactus Pads
Start with healthy Opuntia ficus-indica pads (also called nopales) from a nursery or trusted grower. Look for pads that are firm, free of soft spots, and have 2-3 inches of thickness—thicker pads root more reliably. I like to choose pads with 2-3 areoles (the fuzzy bumps where spines grow) because they produce fruit more consistently.
Let the pads dry out for 2-3 days after purchase. This prevents rot when you plant them. Place them in a dry, shaded spot and watch for any signs of moisture—if they feel damp, give them another day. Once completely dry, you're ready to plant. I always wear thick gardening gloves when handling them; those spines pack a punch!
☀️ Step 2: Plant in Well-Draining Soil with Full Sun
Use a cactus and succulent mix or amend regular potting soil with 50% perlite or coarse sand to ensure excellent drainage. Poor drainage is the #1 killer of prickly pears. Fill a pot at least 12 inches deep (or plant directly in ground if your climate allows) and create a small mound in the center.
Place the dried pad on top of the mound and press it gently into the soil until it stands upright. The base should be 1-2 inches below the soil surface—this prevents rot while allowing roots to establish. Water lightly immediately after planting, just enough to moisten the soil around the base. Avoid soaking the pad itself.
💧 Step 3: Water and Fertilize for Healthy Growth
Water your cactus every 7-10 days during the growing season, allowing the soil to dry completely between waterings. Overwatering causes root rot, which turns pads black and mushy. In winter, reduce watering to once every 3-4 weeks or when the soil feels bone-dry to the touch.
After the first month, feed with a balanced fertilizer (10-10-10) diluted to half-strength every 4-6 weeks during spring and summer. I skip fertilizing in fall and winter—prickly pears go semi-dormant and don't need extra nutrients. Watch for new growth at the areoles; that's your sign the plant is thriving.
✂️ Step 4: Prune and Protect for Fruit Production
In early spring, remove any dead or damaged pads by twisting them gently off the main plant. This redirects energy to healthy growth. Leave 3-4 pads per plant for optimal fruit production. I also remove any spines that might irritate me while working—just pull them out carefully with pliers.
If you live in a cold climate, move potted plants indoors before temperatures drop below 20°F. Prickly pears tolerate light frost but won't survive prolonged cold. In warmer zones, they thrive outdoors year-round. Watch for tiny yellow flowers in spring—they'll eventually turn into your fruit!
🍈 Step 5: Harvest and Enjoy the Fruit
Prickly pears are ready to harvest when they turn deep red or yellow and feel slightly soft when gently squeezed. Use thick gloves and long sleeves—those spines don't disappear when the fruit ripens! Cut the fruit from the pad with clean pruners, leaving a ½-inch stem attached.
To eat, wash the fruit thoroughly, then score the skin with a knife and peel it off. The flesh inside is sweet and juicy, perfect for fresh eating, jams, or cocktails. Save the pads—they're edible too! Just peel them like fruit and cook them like vegetables. One healthy plant yields 4-6 fruits per season with proper care.
Tips & tricks for growing Italian prickly pears
A few simple tricks will help you cultivate thriving Italian cactus fruit with minimal effort—and avoid the common pitfalls that kill new plants.
Selection Matters: When choosing your Opuntia ficus-indica pads, focus on thickness and areole health. I always look for pads with 2-3 inches of thickness and 2-3 areoles—these produce fruit more consistently. Avoid pads with soft spots or yellowing; they're already stressed and won't recover. The thicker the pad, the more resilient it is during establishment.
Drying is Non-Negotiable: That 2-3 day drying period before planting isn't optional—it's what prevents rot. I've learned this the hard way after losing three batches to fungal infections. Place pads in a dry, shaded spot and check daily. If they feel damp after day 3, extend the drying time. This step is what separates successful growers from those who give up after their first failure.
Soil Science: The 50% perlite or coarse sand amendment in your soil mix isn't just about drainage—it's about creating an oxygen-rich environment for roots. I've had the best success with a mix that's almost gritty to the touch. Test your soil by squeezing a handful: if it holds shape when released, add more perlite. Poor drainage is the silent killer that turns your investment into blackened mush overnight.
Fertilizer Timing: The 4-6 week feeding schedule during spring and summer is crucial because prickly pears are heavy feeders when they're actively growing. I always use a 10-10-10 balanced fertilizer at half-strength—this prevents salt buildup that can damage roots. The key is to fertilize right after watering, so the nutrients get absorbed immediately rather than sitting in the soil.
Pro Tips for Italian Cactus Fruit
- A few simple tricks will help you cultivate thriving Italian cactus fruit with minimal effort—and avoid the common pitfalls that kill new plants.
- Selection Matters: When choosing your Opuntia ficus-indica pads, focus on thickness and areole health.
- Drying is Non-Negotiable: That 2-3 day drying period before planting isn't optional—it's what prevents rot.
Frequently asked questions
Got questions about growing and enjoying Italian cactus fruit (prickly pears)?
Here are answers to the most common ones—from planting to harvest and everything in between!
Can I grow prickly pears indoors?
While possible, it’s not ideal. Prickly pears thrive in full sun (6+ hours daily) and need space to grow. If you must grow them indoors, place them near a south-facing window and supplement with grow lights. Expect slower growth and smaller fruit compared to outdoor plants.
How long does it take for a prickly pear to bear fruit?
Patience is key! Young plants (1–2 years old) may not fruit at all. Most cacti take 3–5 years to produce fruit, depending on climate, care, and variety. In warmer regions (like Italy), you might see fruit as early as 2 years.
Are the spines dangerous? How do I handle them safely?
Yes, spines can be sharp and irritating! Wear thick gloves when handling the pads or fruit. Use tongs to pluck fruit, and avoid touching the areoles (the fuzzy spots where spines grow). If a spine breaks off, clean the area with soap and water to prevent infection.
What’s the best way to eat prickly pears?
First, peel off the skin (or buy pre-peeled fruit). The flesh is sweet and juicy—eat it fresh, blend into smoothies, or use in desserts like jams, sorbets, or even savory dishes (like Italian prickly pear granita). Avoid the seeds unless you’re making jelly!
Why aren’t my prickly pears fruiting?
Common culprits include:
- Too much shade: Needs full sun (6+ hours).
- Overwatering: Let soil dry completely between waterings.
- Young plant: Wait 3+ years for maturity.
- Lack of pollinators: Hand-pollinate with a soft brush if bees aren’t visiting.
Wrapping up and next steps
Growing your own Italian cactus fruit—or opuntia—is a rewarding journey that blends resilience with delicious results! 🌱 From selecting the right variety to nurturing your prickly pear plants through every season, you’ve now got the tools to succeed.
Whether you’re drawn to their vibrant fruits, drought-resistant charm, or unique culinary potential, your garden (or balcony!) is about to thrive with these fascinating plants.
Ready to take the next step? Start small—plant a few pads this season, experiment with growing conditions, and soon you’ll be harvesting sweet, juicy fruit straight from your own backyard. Buona coltivazione! 🍈✨