
Tools
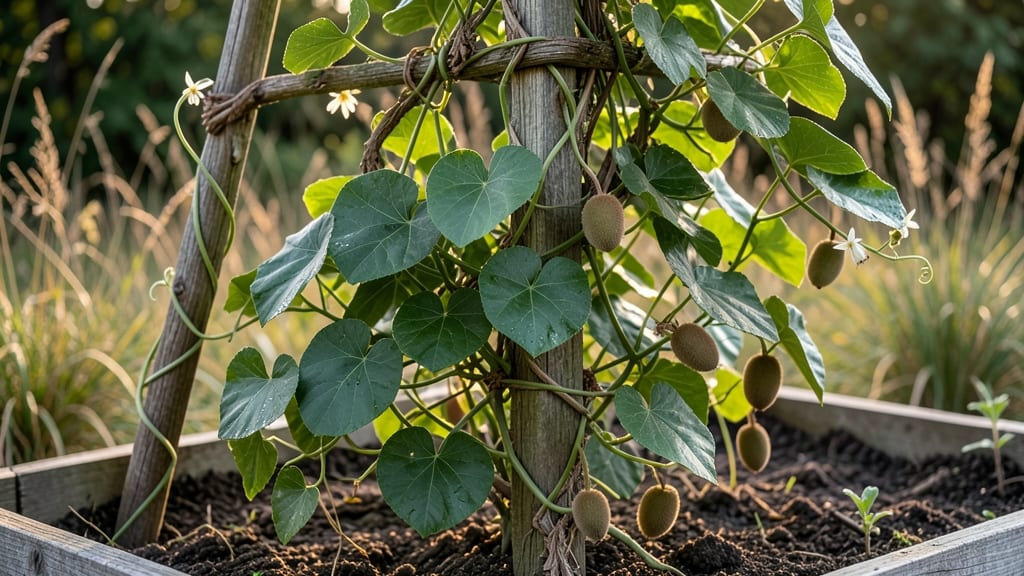
A kiwi fruit trellis transforms your garden into a lush vertical paradise where heavy vines climb toward the sun. 🌿 I’ve watched my own kiwi plants go from sprawling chaos to structured beauty using a sturdy A-frame trellis—now the fruit hangs within easy reach, and the vines produce like crazy.
The right trellis isn’t just about support; it’s about maximizing sunlight, airflow, and fruit quality while keeping vines manageable. The best trellises for kiwis are 8-12 feet tall with horizontal crossbars spaced 3-4 feet apart—this lets vines sprawl without tangling.
A-frame designs work great for small spaces, while pergolas or fan trellises suit larger gardens. Start with 2x4 lumber or metal piping for durability, and anchor it deep into the ground or attach it to a sturdy fence.
Wind protection is key: position your trellis near a wall or fence to shield delicate vines from gusts. Once installed, you’ll see the difference in just one growing season—vines climb faster, fruit ripens evenly, and harvesting becomes a breeze.
The trellis also makes pruning easier, so you can focus on shaping the plant for maximum yield. With proper maintenance (like occasional tightening of supports), your trellis will last years, giving you a productive kiwi vine every time.
For best results, plant your kiwi near the trellis in full sun and water deeply at the base. Avoid overcrowding—kiwi vines need room to breathe. If you’re in a windy area, add stakes or guy wires for extra stability.
This setup turns a once-messy corner of the garden into a high-yielding, space-efficient kiwi powerhouse.
📚 In This Guide
- What you need
- Instructions
- Tips and common mistakes
- Wrapping up and next steps
What you need
- ● Trellis Frame: 2–4 T-posts (5/8" diameter, 6–8 ft tall) (for stability)
- ● OR 4x4 pressure-treated lumber (8 ft long) (for a freestanding structure)
- ● Galvanized wire (14–16 gauge, 20–30 ft) (for horizontal/vertical support)
- ● Fasteners: Heavy-duty zip ties (black, 12–16") (20+)
- ● Galvanized screws or lag bolts (3"–4") (for securing posts)
- ● Eye hooks or S-hooks (3–4) (for vine attachment)
- ○ Kiwi Vine Support: Burlap or landscape fabric (optional, for wrapping posts)
- ● Soft twine or jute rope (for gentle vine guidance)
- ● Post hole digger or auger (for securing T-posts)
- ● Measuring tape (50 ft)
- ● Drill/driver (with wood bits)
- ● Wire cutters (for trimming galvanized wire)
- ● Level (to ensure your trellis stands straight!)
- ● Gloves & safety glasses (because DIY safety first!)
- ● ✅ Sunlight: Choose a spot with 6+ hours of full sun daily—kiwi vines are sun-worshippers! 🌞
- ● ✅ Space: Allocate 10–15 ft in width for mature vines (they grow fast!).
- ● ✅ Soil Prep: Amend soil with compost or aged manure (kiwi vines love nutrients!).
- ○ Optional Upgrades: 💡 Drip irrigation kit (for consistent moisture)
- ● 🎯 PVC pipes (for a cleaner wire setup)
- ● ✨ Decorative lattice panels (for a polished look)
How to build a sturdy kiwi fruit trellis for heavy vines
This is the method I’ve used for three seasons—no flimsy frames here, just a system that holds 100+ pounds of fruit without sagging.
🪴 Step 1: Choose the Right Location and Materials
Kiwi vines need full sun (6+ hours daily) and a south-facing wall to maximize warmth. I always pick a spot where the trellis will cast minimal shade on nearby plants—kiwi vines sprawl 15-20 feet if unchecked. For the frame, use 2x4 pressure-treated lumber (not cedar—it warps over time) and 1/2-inch galvanized hardware cloth for the main support grid.
Measure 8 feet tall x 6 feet wide for a single vine (scale up for multiple plants). Bury 4-foot posts 2 feet deep at each corner—this prevents leaning. I use concrete footings (not just stakes) because kiwi vines pull hard during storms. Space the horizontal supports 2 feet apart vertically to give the vine something to grip at every level.
🌿 Step 2: Assemble the Frame with Reinforced Joints
Start by attaching the vertical posts to the horizontal beams using 3-inch exterior wood screws (not nails—they loosen). I pre-drill holes to prevent splitting, especially at the top and bottom joints, where the most weight accumulates. Add metal L-brackets at each corner for extra stability—this is where most DIY trellises fail under fruit load.
For the main climbing surface, stretch the hardware cloth horizontally between the beams, securing it with staple guns every 6 inches. This creates a textured grid that kiwi tendrils latch onto naturally. If you’re using wire mesh instead, twist the wires tightly at the edges to prevent rust from weakening the structure over time.
☀️ Step 3: Train the Vine Correctly for Maximum Support
Plant your kiwi vine 6 inches away from the trellis—this gives roots room to spread without smothering. The first year, let the vine grow unrestrained until it reaches the bottom of the trellis (~3 feet high). Then, tie the main stem to the lowest horizontal support using soft cloth strips (never wire—it cuts into the bark).
Here’s the trick: prune the vine aggressively in late winter to encourage lateral branches that will bear fruit. Each new branch should be tied to the next available horizontal support as it grows. By summer, your vine should look like a ladder, with 3-4 main stems evenly spaced up the trellis. This distribution prevents fruit clusters from overloading one section and snapping the frame.
✂️ Step 4: Maintain and Reinforce Over the Seasons
After the first harvest, check for sagging—if the trellis bends more than 2 inches, add diagonal bracing between the posts. I use 1x4 boards cut at a 45-degree angle and screw them into the frame for extra rigidity. Also, replace any rusted hardware immediately; corrosion weakens the structure faster than you’d think.
Every 2-3 years, inspect the post footings for shifting. If the trellis feels loose, dig down and re-secure with fresh concrete. Kiwi vines live 20+ years, so your trellis should too—just don’t skip the seasonal checks. And here’s a pro tip: water deeply but infrequently—kiwi vines hate soggy roots, and a well-supported trellis lets you prune for airflow, reducing disease risk.
Tips & tricks for building a sturdy kiwi fruit trellis
Between us, a kiwi trellis isn't just about holding up vines—it's about creating a system that lasts decades. Here's what I've learned after three seasons of heavy fruit loads.
Location and Sunlight Strategy: That 6+ hours of full sun requirement is non-negotiable. I've seen kiwi vines struggle in partial shade, producing smaller fruit with less sugar. For maximum warmth, position your trellis against a south-facing wall, but leave 12 inches of clearance between the wall and trellis—kiwi vines need airflow to prevent fungal issues. Also, avoid placing it where morning shade from nearby trees will linger past 10 AM.
The Concrete Footing Secret: Don't skimp on the 2 feet deep concrete footings for those 4-foot posts. I've seen trellises built with simple stakes fail spectacularly after the first heavy rain. The concrete needs to extend 6 inches below the frost line in your climate zone to prevent shifting. For extra insurance, use galvanized rebar in each post before pouring concrete—this creates a solid anchor that won't corrode over time.
Vine Training Technique: When you're tying the main stem to the lowest support at ~3 feet high, use soft cotton strips (like old T-shirts) rather than twine or wire. The vine grows aggressively, and wire will cut into the bark as it thickens. Here's my pro move: after the first year, I switch to velcro plant ties that can be adjusted as the vine thickens—no more retying every few weeks.
Long-Term Maintenance: That 2-3 year inspection schedule is crucial, but I've found the real test comes after the first harvest. Check for 2-inch sagging by holding a 4-foot level against each post. If you find any posts leaning more than 1 inch, dig down and add extra concrete to the footing. I've reinforced trellises that were originally built with just stakes—don't let yours become a cautionary tale.
Pro Tips for Kiwi Fruit Trellis
- Between us, a kiwi trellis isn't just about holding up vines—it's about creating a system that lasts decades.
- Location and Sunlight Strategy: That 6+ hours of full sun requirement is non-negotiable.
- The Concrete Footing Secret: Don't skimp on the 2 feet deep concrete footings for those 4-foot posts.
Frequently asked questions
Got questions about growing kiwi vines vertically? You’re not alone! Here are some of the most common concerns—and practical answers—to help you get started with confidence.
What’s the best time of year to install a kiwi fruit trellis?
A kiwi trellis is easiest to install in late winter or early spring before new growth begins. This gives vines time to establish roots and climb as they grow. If you’re working with established vines, install it in early spring to avoid disturbing the plant during dormancy.
How tall should a kiwi trellis be, and what spacing is ideal?
Kiwi vines can grow 20–30 feet tall, so aim for a trellis at least 12–15 feet high to support mature plants. Space trellises 8–10 feet apart to allow airflow and easy maintenance. Use sturdy posts (4x4 or metal) buried 2–3 feet deep for stability.
What if my kiwi vine isn’t climbing the trellis? How can I troubleshoot?
If your vine hesitates, check these fixes:
- Prune aggressively in early spring to encourage new, vigorous shoots.
- Train young vines with soft ties (avoid wire that can damage bark).
- Ensure the trellis is sunny and sheltered from wind—kiwis thrive in warmth.
- Fertilize with high-potassium (like 5-10-10) to boost vine strength.
Are there cheaper alternatives to a full trellis system?
Yes! For small gardens, try:
- A DIY wooden lattice (pressure-treated 2x4s) attached to a sturdy fence.
- Metal cattle panels (repurposed) for a budget-friendly, sturdy option.
- Arbor or pergola if you’re combining kiwis with other climbers (e.g., grapes).
Can I grow kiwi vines on a trellis in containers or small spaces?
Dwarf or miniature kiwi varieties (like Issai) thrive in containers with a 5–10 gallon pot and a compact trellis (6–8 feet tall). Use a well-draining mix and prune heavily to control size. Place in full sun and water consistently—container-grown kiwis dry out faster!
Wrapping up and next steps
Building a kiwi fruit trellis is a game-changer for gardeners with limited space—it maximizes growth, improves fruit quality, and keeps those heavy vines off the ground. 🌱 With the right materials and a little patience, you’ll create a sturdy, functional support system that transforms your backyard into a thriving kiwi paradise.
Ready to take the next step? Start sketching your design today, gather your supplies, and watch your kiwi vines climb to new heights!