Trees
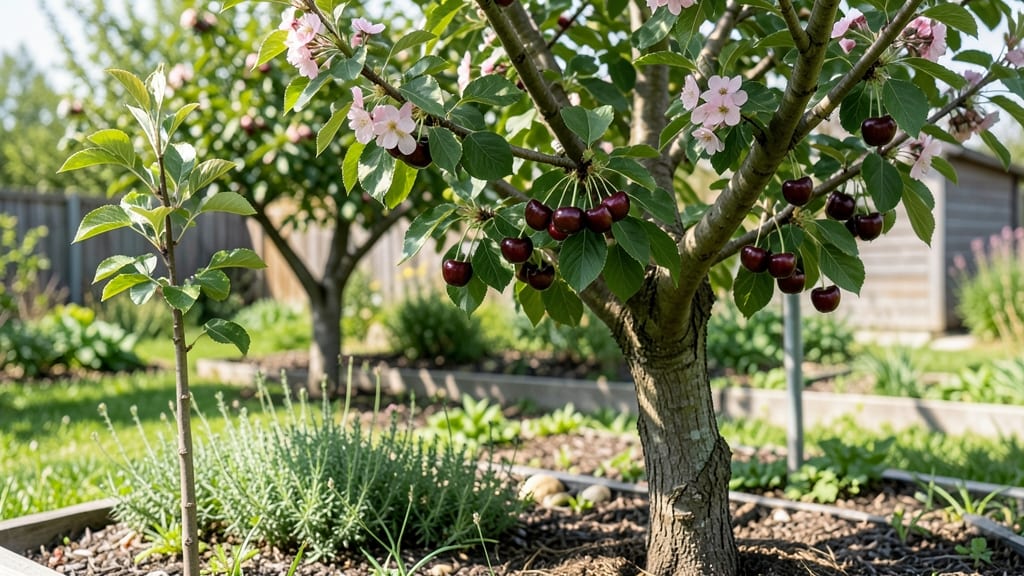
Self-pollinating cherry trees like Stella® and Lapins deliver sweet fruit without needing a second tree. 🌱 I planted mine in a 5-gallon container last spring, and it’s now loaded with dark red cherries—proof that dwarf varieties work even in tight spaces.
These trees thrive in full sun and well-draining soil, making them perfect for small yards, patios, or even large pots. Just avoid heavy clay soil, which can stunt root growth, and you’ll get consistent harvests for years. The real magic?
Their self-pollinating nature means no bees or extra trees needed—just proper pruning to keep branches open for airflow. Thin fruit early to prevent overloading, and you’ll get larger, juicier cherries. Perfect for urban gardeners, balcony growers, or anyone tired of sparse harvests. Let’s get those trees producing!
📚 In This Guide
- What you need
- Instructions
- Tips and common mistakes
- Wrapping up and next steps
What you need
- ● Self-pollinating cherry tree (dwarf variety): 1–3 trees (e.g., Stella®, Lapins, or Sweetheart—choose based on your climate zone).
- ● Size: 6–8 ft tall at maturity (bare-root or container-grown).
- ● Planting site: Full sun (6+ hours/day).
- ● Well-draining soil (amend with compost if needed).
- ● Space: 8–10 ft apart (for dwarf varieties) or 5–6 ft in containers.
- ● Soil amendments: 5 lbs of 5-10-10 fertilizer (balanced NPK ratio).
- ● 2–3 lbs of organic matter (e.g., compost or aged manure).
- ● Tools: Shovel or trowel.
- ● Garden gloves.
- ● Pruning shears (sterilized).
- ● Watering can or hose with a gentle nozzle.
- ● Mulch: 2–3 inches of wood chips or straw to retain moisture.
- ● Tree supports: Stakes or cages for young trees (if needed in windy areas).
- ● Drip irrigation system: For consistent watering (especially in hot climates).
- ● Fruit thinning tool: To manage heavy loads and improve fruit size.
- ● Bird netting: To protect ripe cherries from pests.
Step-by-Step guide to planting and caring for dwarf self-pollinating cherry trees
Here’s how I’ve successfully grown these compact fruit powerhouses—packing heavy harvests into tiny spaces.
🪴 Step 1: Choose the Right Location and Prepare the Soil
Pick a spot with at least 6 hours of full sun daily—cherries need warmth to ripen fruit properly. I always test the site first by watching how sunlight moves across the area throughout the day. Avoid low spots where cold air settles in spring, as cherries are frost-sensitive when blooming.
Amend the soil with 3-4 inches of compost mixed into the top 12 inches of soil. Cherries prefer slightly acidic soil (pH 6.0-6.5). If your soil is heavy clay, blend in 20% sand to improve drainage. The hole should be twice as wide as the root ball but no deeper—this encourages roots to spread horizontally for stability.
🌱 Step 2: Plant at the Correct Depth and Water Thoroughly
Remove the tree from its container and gently loosen the roots if they’re circling. Place it in the hole so the graft union (the swollen area near the base) sits 2-3 inches above soil level. This prevents buried grafts from rotting. Backfill with native soil mixed with compost, tamping lightly as you go to eliminate air pockets.
Water deeply right after planting—10-15 gallons total—to settle the soil and eliminate air gaps. Mulch with 2-3 inches of wood chips, keeping it 6 inches away from the trunk to prevent rot. I always water again in 7-10 days to encourage root establishment before letting the tree dry slightly between waterings.
☀️ Step 3: Prune for Structure and Airflow in Early Spring
Prune before buds swell in late winter or early spring to shape the tree and remove dead wood. Focus on opening the center to improve airflow—cherries are prone to fungal diseases if branches grow too tightly. Cut back 1/3 of last year’s growth to encourage fruiting spurs, which produce the most cherries.
Remove any suckers (shoots growing from the base) immediately—they drain energy from the tree. Thin out crossing branches to prevent rubbing, which creates wounds where bacteria can enter. A good rule: Never leave a stub—always cut just outside the branch collar.
💧 Step 4: Water Deeply and Fertilize for Heavy Fruit Loads
Water once a week during the first growing season, providing 15-20 gallons per tree each time. Let the soil dry slightly between waterings—top 2 inches dry to touch—to prevent root rot. In fruiting years, increase watering to 20-25 gallons weekly during dry spells, as cherries need consistent moisture to develop properly.
Fertilize twice a year: once in early spring with 10-10-10 (1/2 cup per tree) and again after harvest with 5-10-10 (1/4 cup per tree). Avoid high-nitrogen fertilizers in summer—they promote leafy growth at the expense of fruit. I also side-dress with compost tea every 4 weeks to boost microbial activity in the soil.
✂️ Step 5: Thin Fruit and Prune Annually for Long-Term Health
When cherries are pea-sized, thin them to 6 inches apart on each branch. This prevents overcrowding, which leads to small, sour fruit. A general guideline: Leave 10-15 cherries per foot of branch length. Remove any misshapen or damaged fruit immediately—they won’t ripen evenly and can attract pests.
Prune again after harvest to remove dead wood and shape the tree. Thin out 10-20% of the oldest branches each year to maintain vigor. I also check for silver leaf disease (a fungal infection) by scraping bark—if white, stringy strands appear, prune infected branches immediately and sterilize tools with 70% rubbing alcohol.
Tips & tricks for perfect dwarf self-pollinating cherry trees
Here's what I've learned after growing these compact fruit trees—details that make all the difference between a decent harvest and an absolutely incredible one.
Sunlight Strategy: Those 6 hours of full sun are non-negotiable, but here's the trick: position your tree so it catches morning sun first. This helps prevent afternoon sunburn, especially in hot climates. I always test the spot by observing sunlight patterns for a full day before planting—this prevents surprises when your tree starts flowering.
Root Health Secret: When loosening circling roots in Step 2, I make a few small vertical cuts along the bottom of the root ball with a clean knife. This encourages roots to spread outward more quickly into the surrounding soil. The goal is to mimic how roots would grow in nature rather than forcing them to stay in a tight ball.
Watering Wisdom: The 10-15 gallons of water right after planting might seem like a lot, but it's essential to eliminate air pockets around the roots. I use a garden hose with a gentle spray setting to water slowly in concentric circles, working outward from the trunk. This prevents soil erosion while ensuring thorough saturation.
Pruning Precision: When cutting back 1/3 of last year's growth in Step 3, I always look for branches that grow inward or cross others. These create wounds that become entry points for fungal diseases. I make my cuts just outside the branch collar—this is the swollen area where the branch meets the trunk—and I sterilize my pruners with rubbing alcohol between cuts to prevent spreading disease.
Pro Tips for Self Pollinating Cherry Fruit Trees
- Here's what I've learned after growing these compact fruit trees—details that make all the difference between a decent harvest and an absolutely incredible one.
- Sunlight Strategy: Those 6 hours of full sun are non-negotiable, but here's the trick: position your tree so it catches morning sun first.
- Root Health Secret: When loosening circling roots in Step 2, I make a few small vertical cuts along the bottom of the root ball with a clean knife.
Frequently asked questions
Got questions about self-pollinating cherry trees? You’re not alone!
Here are answers to the most common queries to help you grow a thriving orchard—even in small spaces.
Do self-pollinating cherry trees still need bees?
Not necessarily! These varieties produce fruit without cross-pollination, so bees aren’t required. However, bees still help with extra pollination, which can boost yield. If you’re in a bee-scarce area, hand-pollination (gentle shaking of branches) works too!
How long does it take for a self-pollinating cherry tree to bear fruit?
Patience is key! Dwarf varieties typically bear fruit in 2–3 years, while standard-sized trees may take 4–5 years. Proper care—like watering, pruning, and winter protection—speeds up the process.
Can I grow self-pollinating cherries in containers?
Dwarf varieties thrive in large pots (at least 15–20 gallons) with well-draining soil. Just ensure the container has drainage holes and move it to a sunny spot. Container-grown trees may need more frequent watering and winter protection in cold climates.
What pests should I watch for with self-pollinating cherry trees?
Common culprits include aphids, Japanese beetles, and fruit flies. Monitor leaves and fruit regularly. Use neem oil or insecticidal soap for mild infestations. For severe cases, consult a local arborist.
Are self-pollinating cherries sweeter than cross-pollinated ones?
Flavor depends on the variety! Some self-pollinating cherries (like ‘Stella’ or ‘Sweetheart’) are bred for sweetness, while others may be tart. Taste-test a few types to find your favorite. Pro tip: Ripeness = sweeter cherries!
Wrapping up and next steps
Growing self-pollinating cherry fruit trees, especially dwarf varieties, is a fantastic way to enjoy sweet, homegrown fruit—even in small spaces! 🌱 These trees require minimal effort, deliver high yields, and thrive with the right care.
Whether you're a beginner or a seasoned gardener, their low-maintenance nature makes them a rewarding choice for any backyard or patio.
Ready to take the next step? Pick your favorite dwarf variety, gather your supplies, and start planting—your future harvest is just a season away! 🍒🌟