
Fertilization
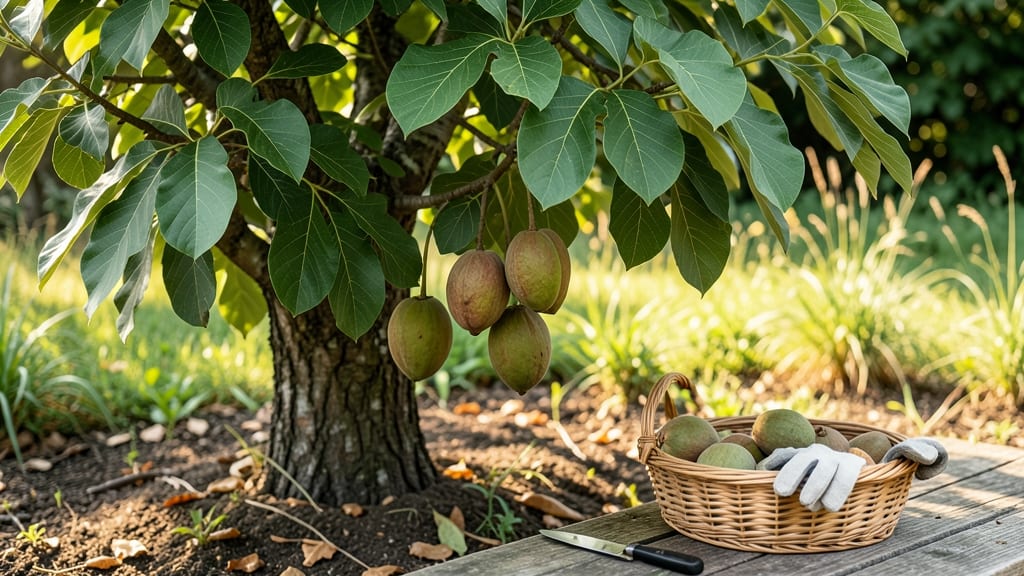
Growing American paw paw fruit means tropical flavors in your own backyard—no passport required. 🌿 These shade-loving trees produce custardy, mango-like fruit that’s sweeter than anything you’ll find in stores, and they thrive where other fruit trees struggle.
My first harvest last summer was a game-changer: the moment I bit into that creamy, tropical fruit, I knew I’d never buy paw paws again.
Paw paws love rich, moist soil and partial shade—think dappled sunlight under tall trees. They’re picky about soil drainage but reward patience with 10-foot-tall trees that produce fruit in just 3-5 years.
The key is getting the planting right: dig a hole twice as wide as the root ball and mix in compost for that first burst of growth. Water deeply once a week during dry spells, but avoid soggy roots—they’re the #1 killer of young trees.
By summer, you’ll spot those distinctive banana-shaped leaves and maybe even a few small, maroon fruits forming. The real magic happens in late summer when the fruit ripens—soft, fragrant, and packed with flavor.
One tree can yield 20-50 pounds of fruit, enough to share with neighbors or freeze for winter smoothies. Prune in late winter to remove dead wood and open the canopy for better air circulation.
Here’s the secret: paw paws are finicky but forgiving. They handle urban pollution better than most fruit trees and even tolerate brief periods of drought once established. The biggest challenge?
Patience—these trees take time to mature, but the payoff is worth every wait. Start with one plant, and soon you’ll be the envy of your block with homegrown tropical fruit.
📚 In This Guide
- What you need
- Instructions
- Tips and common mistakes
- Wrapping up and next steps
What you need
- ● Paw paw seeds or saplings: Seeds: 5–10 (fresh, from ripe fruit) or
- ● Saplings: 1–2 (nursery-grown, 1–2 years old)
- ● Well-draining soil: 5–10 bags (mix of loam, compost, and sand—paw paws hate soggy roots!)
- ● Garden space: 20–30 sq ft per tree (full sun to partial shade; they thrive under canopy trees!)
- ● Fertilizer: Balanced organic fertilizer (10-10-10 or similar, 1 lb per tree)
- ● Compost or worm castings (2–3 cups per planting hole)
- ● Mulch: 2–3 yards (straw, wood chips, or leaves to retain moisture)
- ● Watering can or hose: (with adjustable nozzle for gentle watering)
- ● Pruning shears: (sterilized, for shaping young trees)
- ● Soil pH test kit (ideal range: 6.0–7.0)
- ● Tree guards (to protect young saplings from deer/browsing)
- ● Slow-release fertilizer tablets (for established trees)
- ● Drip irrigation system (for consistent moisture in dry climates)
- ● Paw paw pollination companion (like Carolina silverbell or spicebush—they love cross-pollinators!)
Step-by-Step instructions for growing American paw paw trees
Here's how I've successfully grown these unusual, shade-loving trees with sweet tropical fruit.
🌱 Step 1: Select and Prepare the Planting Site
Paw paws thrive in partial to full shade with moist, well-draining soil. I look for locations that receive 4-6 hours of dappled sunlight daily—think under large trees where the canopy filters light. Avoid low spots where water pools after rain.
Test your soil's moisture by digging a 6-inch hole. If water drains within 2-3 hours, your site is perfect. If it stays soggy, amend with 2 inches of compost mixed into the top 12 inches of soil to improve drainage. Paw paws hate "wet feet" but love rich organic matter.
🪴 Step 2: Plant Bare-Root Trees at the Right Time
Plant 1-year-old bare-root trees in early spring when soil temperatures reach 50°F or in fall before the first frost. Dig a hole twice as wide as the root ball but only as deep—paw paws resent being buried too deeply. Gently spread the roots outward in the hole and backfill with native soil.
I always water the hole thoroughly before planting to settle the soil. After placing the tree, water deeply again to eliminate air pockets. The root flare (where roots meet trunk) should sit 1-2 inches above soil level—burying it invites rot. Mulch with 3 inches of wood chips, keeping mulch 6 inches away from the trunk to prevent moisture buildup.
☀️ Step 3: Provide Consistent Moisture and Protection
Water newly planted trees 2-3 times weekly until established, keeping soil evenly moist but not soggy. Paw paws have shallow roots that dry out quickly in hot weather. You'll know moisture is right when the top 2 inches of soil feel damp but not wet to the touch.
Protect young trees from deer and rabbits with 8-foot tall wire cages for the first two years. I've seen entire saplings disappear overnight—these animals adore paw paw bark. Also, install a tree guard to prevent lawnmower damage to the trunk.
⏰ Step 4: Fertilize and Prune for Fruit Production
Apply a balanced 10-10-10 fertilizer in early spring at ¼ pound per 100 square feet of planting area. Paw paws respond well to organic matter but don't need heavy feeding. I avoid synthetic fertilizers after the first year—they promote leafy growth at the expense of fruit.
Prune in late winter to remove dead, crossing, or diseased branches. The goal is an open center that allows light to reach the interior. You'll see fruit develop on 2-3 year old wood—never prune branches bearing fruit. Thin fruit clusters to 6-8 inches apart when they're golf ball sized to ensure larger, sweeter paw paws.
🍈 Step 5: Harvest and Enjoy the Tropical Fruit
Paw paws ripen in late summer to early fall when they turn golden yellow and become slightly soft to the touch. I harvest by gently twisting the fruit from the stem—don't cut them to avoid spreading disease. The fruit's papery skin should peel back easily when ripe.
Store harvested paw paws at 55-60°F for 1-2 weeks until fully ripe. The flavor resembles a mix of banana, mango, and pineapple. I always freeze extras by slicing and spreading on a tray before bagging—frozen paw paws make delicious smoothies and sorbets for months.
Tips & tricks for perfect American paw paw fruit growth
These simple tricks will help you avoid common pitfalls and maximize your tropical fruit harvest.
Site Selection Secret: Look for locations with mature trees that provide dappled shade—this mimics paw paws' native forest habitat. I've found that areas with morning sun and afternoon shade work best. The 4-6 hours of sunlight mentioned in Step 1 should be gentle, filtered light rather than direct midday sun, which can scorch the leaves. Test potential sites by observing how sunlight moves through the canopy throughout the day.
Planting Precision: When planting your 1-year-old bare-root trees in Step 2, pay special attention to the root flare. This is where the roots meet the trunk, and it should sit 1-2 inches above soil level. I've seen many gardeners bury this junction, which can lead to rot. After planting, water deeply to eliminate air pockets—this is crucial because paw paws have shallow roots that need good soil contact for proper nutrient uptake.
Watering Wisdom: The 2-3 times weekly watering schedule in Step 3 might need adjustment based on your climate. In hotter regions, you may need to water daily until the tree is established. Always check the top 2 inches of soil—it should feel damp but not wet. Overwatering is a common mistake that leads to root rot, while underwatering causes stress that reduces fruit production. Consider using a moisture meter for precise monitoring.
Pruning Payoff: When thinning fruit clusters in Step 4, aim for 6-8 inches apart when they're the size of golf balls. This spacing ensures each fruit gets proper nutrients and sunlight, resulting in larger, sweeter paw paws. I've noticed that trees with overcrowded fruit often produce smaller, less flavorful fruits. Also, avoid pruning branches with fruit—these develop on 2-3 year old wood, so be patient and let them mature.
Pro Tips for American Paw Paw Fruit
- These simple tricks will help you avoid common pitfalls and maximize your tropical fruit harvest.
- Site Selection Secret: Look for locations with mature trees that provide dappled shade—this mimics paw paws' native forest habitat.
- Planting Precision: When planting your 1-year-old bare-root trees in Step 2, pay special attention to the root flare.
Frequently asked questions
How long does it take for a paw paw tree to bear fruit?
Patience is key! Paw paw trees typically take 3–5 years to produce fruit after planting, though some vigorous varieties may fruit earlier. Young trees focus on root and canopy growth first—give them time, and reward yourself with patience!
Can I grow paw paws in containers, or do they need a garden?
While paw paws thrive in deep, well-drained soil in gardens, they can grow in large containers (20+ gallons) for 1–2 years. Use a mix of compost and perlite, and ensure the pot drains well. Just know: container-grown trees may fruit later or produce smaller yields.
Why aren’t my paw paw fruits ripening?
Paw paws need full sun to partial shade (6+ hours of light) and consistent moisture—but not soggy soil. Check for:
- Sunlight: Too much shade delays ripening.
- Water: Drought stress can cause fruits to drop.
- Pollination: Paw paws rely on flies and beetles—plant near wild areas if needed.
What’s the best way to store paw paw fruit?
Paw paws are highly perishable—ripe fruit lasts 2–3 days at room temp. For longer storage:
- Refrigerate: Unripe fruits can ripen in the fridge (3–5 days).
- Freeze: Slice and freeze for smoothies or baking (up to 6 months).
- Pro tip: Avoid ethylene-sensitive veggies (like apples) nearby—they speed up spoilage!
Are paw paws easy to find in stores, or should I grow my own?
Paw paws are rare in grocery stores—most are grown by backyard enthusiasts! If you can’t find them fresh, try:
- Local nurseries: Look for grafted trees in spring/fall.
- Online: Specialty sellers like PawPawSource.com ship bare-root plants.
- Substitute: Try mango or banana for a similar tropical vibe (but nothing beats the real deal!).
Wrapping up and next steps
The American paw paw fruit is a hidden gem for gardeners seeking low-maintenance, shade-tolerant perennials with tropical-tasting rewards! 🌿 With the right soil, patience, and a few fertilization tricks, you can unlock a bountiful harvest of custardy, mango-like fruit.
Whether you're a beginner or a seasoned grower, this shade-loving plant offers a unique—and delicious—way to diversify your garden.
Ready to take the next step? Start small—plant a few seeds or saplings this season and watch your garden transform into a paw paw paradise. Share your progress with fellow growers, and soon, you’ll be enjoying fresh, homegrown fruit straight from your backyard! 🍈✨