
Pruning
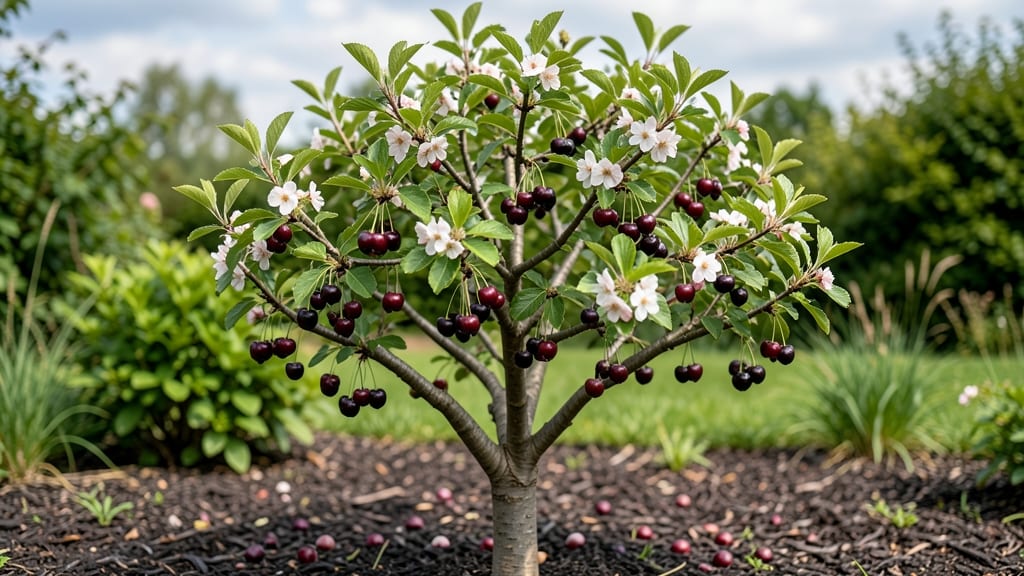
Growing a small cherry-like fruit tree that bursts with blooms and fruit all season is easier than you think. 🌸 My first attempt with a Stardust cherry tree taught me that proper pruning turns a modest plant into a four-season showstopper—delicate spring flowers, summer fruit, and fiery fall foliage, all on a tree that fits tight spaces.
The key is understanding when to prune: late winter for shaping, summer to encourage new growth, and light touch-ups after harvest. Most people over-prune, which stresses the tree and reduces blooms. My rule?
Cut back no more than 25% of the canopy each year, and always at a 45-degree angle just above a bud. The payoff? A tree that keeps producing for decades with minimal effort.
You’ll end up with clusters of tiny, sweet cherries (great for jams or fresh snacking) and clouds of pink blossoms that perfume the air. Even in small yards or containers, these trees thrive—just pick a spot with 6+ hours of sun and well-draining soil.
The first year is about establishing roots; by year two, you’ll have blooms, and by year three, fruit galore.
For those worried about pests, cherry-like trees are tougher than they look. Aphids and borers are the main culprits, but a neem oil spray in early spring keeps them at bay.
And if your tree isn’t fruiting? It’s likely not getting enough sunlight or nutrients—more on that in the full guide. Let’s get those pruners ready!
📚 In This Guide
- What you need
- Instructions
- Tips and common mistakes
- Wrapping up and next steps
What you need
- ● Pruning shears: Bypass pruners (sharp, 6–8 inch blades) for small branches. Pro tip: Disinfect with rubbing alcohol before and after use! 💡
- ● Loppers: 1 pair (for branches ½–2 inches thick). Look for ratcheting or bypass styles for cleaner cuts.
- ● Pruning saw: 1 handheld saw (for thick branches >2 inches). A bow saw or curved blade works best.
- ● Gloves: Heavy-duty gardening gloves (cut-resistant, like mechanics’ gloves or pruning-specific options).
- ● Disinfectant: 1 bottle (70% isopropyl alcohol or copper-based pruning sealant to prevent disease spread).
- ● Rags or paper towels: 2–3 for wiping tools and branches.
- ● Marking twine or tape: 1 roll (to flag branches for removal or special attention).
- ● Bucket or bag: 1 (for collecting pruned branches—10–20 gallon capacity recommended).
- ● Extension pole pruners: For high branches (10–12 ft reach).
- ● Hand saw sharpener: Keeps tools in top shape for effortless cutting! ✨
- ● Pruning sealant: (e.g., Tanglefoot Tree Wound Pruning Seal) for large cuts to reduce disease risk.
- ● Ladder: Sturdy, 3–4 ft aluminum step ladder (if tree is >6 ft tall).
- ● Notebook & pencil: To jot down pruning notes or sketch your tree’s structure.
- ● Know your tree’s variety (e.g., Prunus avium or Prunus cerasus hybrids).
- ● Check the weather forecast—prune on a dry, cloudy day (avoid frost or extreme heat).
- ● Gather tree care records (if available) to track past pruning history.
- ● Wear long sleeves and pants to protect against thorns or sap.
Step-by-step guide to pruning your small cherry-like fruit tree
Here's how to keep your compact fruit tree producing blooms and fruit all year long.
✂️ Step 1: Remove Dead or Diseased Wood First
Start by inspecting the entire tree for branches that are brown, brittle, or showing signs of disease like black spots or oozing sap. These branches won't recover and can spread problems to healthy wood. Use sharp, clean pruning shears to cut just outside the branch collar—the swollen area where the branch meets the trunk. This ensures the wound heals properly.
I always prune dead wood first because it's the easiest way to improve air circulation. Removing these branches early also makes it easier to see the tree's structure for the next steps. If you're unsure whether a branch is dead, scratch the bark with your fingernail—if it's green underneath, it's still alive.
✂️ Step 2: Thin Out Crowded Branches for Better Airflow
Look for branches that cross each other or grow too closely together. These create shaded areas where moisture lingers, inviting fungal diseases. Select one of the crossing branches to remove—usually the smaller or weaker one. Cut back to the branch collar, making a clean cut at a 45-degree angle if it's a larger branch over ½ inch thick. For thinner branches, a straight cut is fine.
Thinning out crowded branches also lets sunlight reach the center of the tree, which is crucial for fruit development. You'll know you've done enough when you can see light filtering through to the inner branches. I aim to remove about 20-25% of the tree's foliage in this step—don't go overboard, or you'll reduce fruit production.
☀️ Step 3: Shape the Tree for Optimal Light Exposure
Step back and look at the tree's overall shape. Your goal is to create an open center with branches spaced 8-12 inches apart to allow sunlight and air to circulate. Focus on removing branches that grow inward or downward, as these block light and create dense, shaded areas. For upward-growing branches, leave them—these help lift the canopy and improve fruit visibility for harvesting.
When shaping, make cuts just above an outward-facing bud or branch. This encourages new growth in the direction you want. If you're unsure which way a bud faces, look for the small bump on the side of the branch—this is where the new shoot will emerge. Avoid cutting back to a stub, as this invites disease and weakens the tree.
⏰ Step 4: Prune for Year-Round Blooms and Fruit
To encourage continuous blooming and fruiting, prune lightly after each harvest. Remove only the oldest wood—branches that produced fruit last season—by cutting them back to a younger, more vigorous branch. This stimulates new growth that will bear fruit in the next cycle. For cherry-like trees, I prune about 10-15% of the oldest wood every 4-6 weeks to keep the tree productive.
Watch for water sprouts—fast-growing, vertical shoots that appear after pruning. These compete with fruit-bearing branches for energy, so remove them as soon as you spot them. You'll know your pruning is working when you see new buds forming along the branches and a steady supply of blooms and fruit throughout the year.
🌱 Step 5: Clean Up and Protect the Tree
After pruning, gather all the clippings and dispose of them in a sealed bag or burn them to prevent disease from spreading. Sterilize your pruning tools with 70% isopropyl alcohol or a 10% bleach solution to kill any lingering pathogens. This is especially important if your tree had any signs of disease earlier in the season.
Apply a balanced, slow-release fertilizer around the tree's drip line—where the branches naturally extend—to replenish nutrients lost during pruning. Water the tree deeply to help it recover from the stress of pruning. You'll notice new growth within 2-3 weeks, signaling that the tree is healing and preparing for another round of blooms and fruit.
Tips & tricks for pruning your compact fruit tree
Here's what nobody tells you about keeping your cherry-like tree thriving—these tricks make all the difference.
Timing is Everything: The best time to prune is during late winter or early spring, just before new growth begins. This timing gives your tree time to heal before the growing season kicks in. If you must prune during the growing season, do it on a cloudy day to reduce stress on the tree. Avoid heavy pruning in late summer or fall, as new growth won't have time to harden off before winter.
Tool Prep Matters: Your pruning shears should be as sharp as a chef's knife—dull tools crush branches instead of making clean cuts. I sterilize my tools with 70% isopropyl alcohol between each cut to prevent spreading disease. For larger branches, use a pruning saw with a fine-tooth blade to avoid tearing the bark. Always clean your tools thoroughly after finishing to keep them ready for next time.
Visual Cues for Success: In Step 2, when thinning crowded branches, aim to see light filtering through the center of the tree. This tells you sunlight is reaching all the way to the inner branches where fruit develops. For shaping in Step 3, look for outward-facing buds—they're the small bumps on branches that tell you where new growth will emerge. Cut just above these buds to encourage growth in the direction you want.
Seasonal Maintenance: After your initial pruning, schedule a light maintenance session every 4-6 weeks to remove water sprouts and any new growth that's competing with fruit-bearing branches. This keeps your tree productive year-round without overwhelming it. I mark my calendar with reminders so I don't miss these crucial touch-ups that make all the difference in fruit production.
Pro Tips for Small Cherry Like Fruit Tree
- Here's what nobody tells you about keeping your cherry-like tree thriving—these tricks make all the difference.
- Timing is Everything: The best time to prune is during late winter or early spring, just before new growth begins. Th...
- Tool Prep Matters: Your pruning shears should be as sharp as a chef's knife—dull tools crush branches instead of maki...
Frequently asked questions
Got questions about growing and pruning your small cherry-like fruit tree?
Here are answers to the most common ones—so you can keep your tree thriving and productive year-round!
What’s the best time of year to prune my small cherry-like fruit tree?
Prune your tree during late winter or early spring (before buds swell) for best results. This timing promotes healthy growth and prepares the tree for the blooming season. Avoid pruning in fall, as it can invite pests or diseases. For light maintenance (like removing dead branches), summer is fine—but avoid heavy pruning then.
How often should I prune my cherry-like fruit tree?
Young trees (under 3 years old) need annual pruning to shape their structure. Mature trees benefit from light pruning every 1-2 years to remove dead wood, improve airflow, and encourage fruit production. Focus on structural cuts in winter and fruit-thinning cuts in summer for optimal yields.
Why are my cherry-like fruits not ripening properly?
If your fruits aren’t ripening, check these common issues:
- Insufficient sunlight: Ensure your tree gets 6+ hours of direct sun daily.
- Overwatering: Too much moisture can cause fruit drop. Water deeply but infrequently (1-2 inches per week).
- Nutrient deficiency: Yellow leaves? Add a balanced fruit-tree fertilizer in early spring.
- Pests/disease: Inspect for aphids, birds, or fungal spots—treat early with organic sprays.
Can I grow a cherry-like fruit tree in a container?
Yes! Dwarf varieties (like ‘Stella’ or ‘Sweetheart’ cherries) thrive in containers with well-draining soil and a 15-20 gallon pot. Place it in full sun and repot every 2-3 years. Just remember: container trees need more frequent watering and pruning to prevent root-bound stress.
What should I avoid when pruning my cherry-like tree?
Avoid these pruning mistakes:
- Over-pruning: Never remove more than 25% of the canopy in one session.
- Cutting too close: Leave a 1/4-inch stub to prevent disease entry.
- Ignoring branch angles: Avoid steep cuts (>45°) that can weaken the tree.
- Pruning during wet weather: Wait for dry conditions to reduce fungal risks.
Still unsure? Snap a photo of your tree’s branches and ask a local master gardener for tailored advice!
Wrapping up and next steps
Growing a small cherry-like fruit tree with vibrant blooms and bountiful fruit is a rewarding journey—one that starts with the right pruning techniques! By mastering the art of seasonal shaping, disease prevention, and strategic cuts, you’ll ensure your tree thrives year-round.
Whether you’re a beginner or a seasoned gardener, these tips will help you cultivate a healthy, productive tree that delights your senses and your taste buds.
Ready to transform your garden? Start by reviewing your tools and scheduling your first pruning session—your future harvests will thank you! 🌿✨