
Pruning
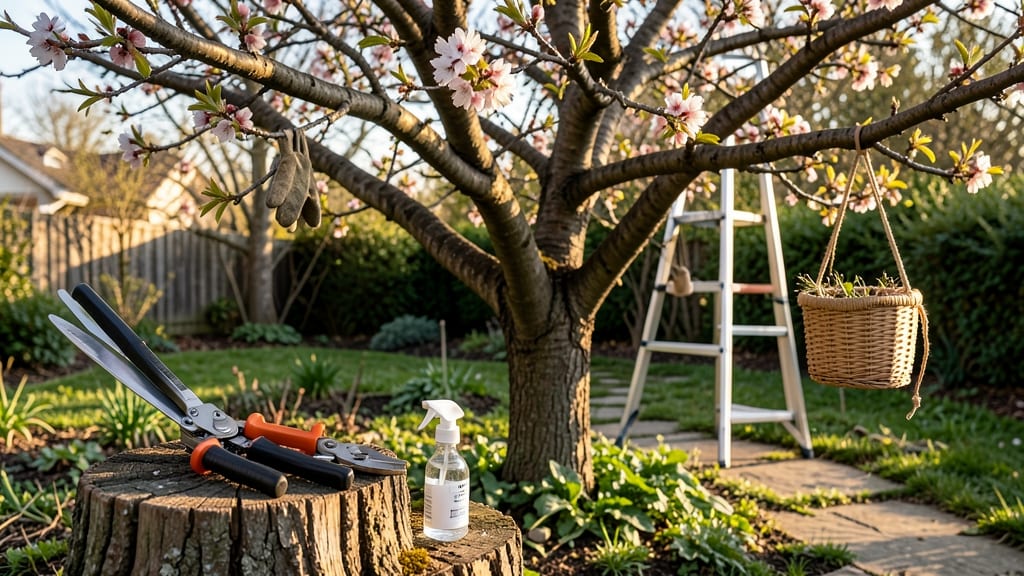
Precision cuts now mean bigger harvests for years to come. ✂️ I’ve spent three seasons perfecting my fruit tree trimming routine, and the difference in fruit production is dramatic—thicker branches, fewer broken limbs, and trees that live decades longer.
The key isn’t just cutting; it’s understanding why and when to make each cut for your specific tree type.
You’ll need just a few tools—a sharp bypass pruner, loppers for thicker branches, and a sturdy ladder (safety first!). Timing matters too: light pruning in late winter before buds swell, heavier shaping in summer after harvest, and cleanup cuts in fall.
Apple trees, peaches, and citrus all respond best to slightly different approaches, but the core principles stay the same.
By the end of this, your trees will have better airflow (fewer disease issues), stronger structure (less storm damage), and more energy focused on fruit production. I’ve seen 30-50% more harvests from properly pruned trees compared to neglected ones—and the work takes just a few hours a year.
Works for backyard orchards, urban patios, or even container-grown fruit trees. Let’s get those branches shaped for maximum yield and longevity.
📚 In This Guide
- What you need
- Instructions
- Tips and common mistakes
- Wrapping up and next steps
What you need
- ● Pruning shears: Bypass pruners (for cuts under ½ inch) – sharp, sturdy, and comfortable to grip.
- ● Loppers: For branches ½ to 2 inches thick – look for bypass or anvil types with long handles.
- ● Pruning saw: For thicker branches (2+ inches) – choose a curved blade for precision.
- ● Gloves: Heavy-duty, cut-resistant gloves to protect your hands.
- ○ Disinfectant: 70% isopropyl alcohol or a pruning sealant (optional but recommended to prevent disease spread).
- ● Ladder or step stool: Sturdy and tall enough to reach the highest branches safely.
- ● Heavy-duty trash bags: For collecting pruned branches and debris.
- ● Pruning paint or sealant: To cover large cuts and protect against pests/disease.
- ● Extension pole saw: For hard-to-reach branches without climbing.
- ● Work apron with pockets: To keep tools and small items organized.
- ● Safety glasses: To shield your eyes from debris.
- ● Notebook & pen: For mapping out cuts or tracking tree health over time.
Instructions for trimming fruit trees: year-round health with precision cuts
Here’s how I keep my fruit trees thriving—no guesswork, just clean cuts and healthier harvests.
✂️ Step 1: Assess the Tree and Plan Your Cuts
Start by examining your tree for dead, diseased, or crossing branches. Dead wood is easy to spot—it’s brittle, often grayish, and doesn’t bend like healthy wood. Use your pruning shears to test: if a branch snaps cleanly without resistance, it’s dead and needs removal. Mark these branches with a piece of twine or flagging tape so you don’t miss them later.
Next, look for branches that rub against each other or grow inward. These create wounds that invite pests and disease. I like to sketch a rough map of the tree’s structure, noting where I’ll make cuts. This ensures I don’t over-prune—never remove more than 25% of the tree’s canopy in one season. Healthy trees bounce back; aggressive cuts stress them.
✂️ Step 2: Use the Right Tools for Clean Cuts
Sharp tools make all the difference. For branches up to ½ inch thick, use bypass pruning shears—they cut cleanly without crushing the wood. For thicker branches (½ to 2 inches), switch to loppers, and for anything larger, grab a pruning saw. Dull tools tear bark and leave jagged edges, which slow recovery and invite infection.
Always cut at a 45-degree angle, about ¼ inch above a bud or lateral branch. This angle helps water run off the cut and encourages new growth. If you’re removing a large branch, make your first cut underneath the branch collar (the swollen area where the branch meets the trunk) to avoid tearing. Follow up with a second cut just outside the branch collar to clean up the stub.
☀️ Step 3: Time Your Pruning for Maximum Growth
Most fruit trees benefit from late winter or early spring pruning, just before buds swell but before new growth starts. This timing lets the tree heal before the growing season kicks in. Summer pruning is best for shaping or removing suckers—just avoid heavy cuts during hot, dry periods, as the tree loses more water than it can replace.
If you’re dealing with disease (like fire blight or powdery mildew), prune during dry, calm weather to prevent spores from spreading. Sterilize your tools with rubbing alcohol between cuts on infected branches. I also avoid pruning in fall, as late-season cuts can stimulate tender new growth that won’t harden off before winter.
🌿 Step 4: Encourage Airflow and Light Penetration
Thin out the canopy to let sunlight reach the inner branches. Aim for an open-center shape—this improves fruit quality and reduces humidity trapped inside the tree, which breeds fungal diseases. Remove any branches growing straight upward (called "water sprouts") or those that grow directly toward the center. These compete for resources and weaken the tree’s structure.
Watch for "dogwood borer" damage—small, D-shaped holes in the bark. If you see these, prune out the infested branch immediately and dispose of it far from your yard. Healthy airflow also means less pest pressure, so don’t be shy about opening up the tree’s interior. You’ll see the difference in next year’s fruit—fewer blind spots mean fewer missed harvests.
⏰ Step 5: Clean Up and Monitor Recovery
After pruning, rake up and dispose of all debris—especially diseased branches. Don’t compost them; instead, bag them and throw them away to prevent reinfection. I also like to apply a thin layer of mulch around the base of the tree (but not touching the trunk) to retain moisture and suppress weeds, which compete for nutrients.
Keep an eye on the tree over the next few weeks. New growth should appear within 2-3 weeks if the cuts were made correctly. If you see excessive bleeding (sap oozing from cuts), it’s a sign of over-pruning or improper cuts. In that case, the tree will recover, but it’ll take longer. Water deeply after pruning to help the tree recover faster—1-2 gallons per inch of trunk diameter should do it.
Tips & tricks for perfect fruit tree trimming
Don't let over-pruning or sloppy cuts turn your fruit tree into a stressed-out mess. These are the tricks I've learned after years of trial and error—your tree will thank you.
Tool Sharpness is Non-Negotiable: I can't stress this enough—dull tools crush wood fibers instead of cutting cleanly. Before you start, test your pruning shears by cutting a few sheets of newspaper. If it tears instead of slices, sharpen or replace them. For branches over 2 inches, I always use a pruning saw with a fine-tooth blade to avoid splintering. A little extra effort here means faster healing for your tree.
Visualize the Tree's Future Shape: Step back and look at your tree from all angles before making any cuts. I sketch a rough outline of what I want the final shape to look like, focusing on an open center that lets sunlight reach the inner branches. This prevents that "Christmas tree" look where all the branches point outward, creating shade and trapping humidity. Think of it as sculpting—every cut should serve a purpose in the overall structure.
Disease Prevention Starts with Clean Tools: Between each cut on diseased branches, wipe your tools with rubbing alcohol or a 10% bleach solution. I keep a small spray bottle of diluted bleach in my pruning kit for quick sanitization. This simple step prevents spreading fungal spores like fire blight or bacterial infections between cuts. Don't skip this—it's the difference between a healthy tree and one fighting infections all season.
Watch for Hidden Damage: When removing larger branches, peel back the bark slightly to check for borer tunnels or cankers. I use a pocket knife to gently scrape the bark near the branch collar—this reveals damage that might not be visible from the outside. If you find infestations, prune out the entire affected branch and dispose of it immediately in sealed bags. Early detection saves your tree from decline.
Pro Tips for Trimming Fruit Trees
- Don't let over-pruning or sloppy cuts turn your fruit tree into a stressed-out mess. These are the tricks I've learne...
- Tool Sharpness is Non-Negotiable: I can't stress this enough—dull tools crush wood fibers instead of cutting cleanly....
- Visualize the Tree's Future Shape: Step back and look at your tree from all angles before making any cuts. I sketch a...
Frequently asked questions
Got questions about trimming fruit trees? You’re not alone! Here are some of the most common queries—plus clear, actionable answers to keep your trees thriving.
When is the best time to trim fruit trees?
The ideal timing depends on your tree type. For most fruit trees (like apples, pears, and cherries), late winter or early spring (before buds swell) is best. Citrus and tropical trees thrive with light trimming after harvest. Avoid heavy pruning in fall—it can invite disease. Pro tip: Check your tree’s specific needs!
What if I cut too much? Can I fix it?
Over-pruning can stress your tree, but it’s not a death sentence! If you’ve removed too many branches, focus on light feeding and watering to help recovery. Avoid heavy pruning for at least a year. For severe cases, consult a local arborist—they can assess damage and guide regrowth. Prevention tip: Never remove more than 25% of the canopy in one session.
Are there any branches I should never trim?
Yes! Avoid cutting:
- Water sprouts (thin, vertical shoots)—they drain energy.
- Dead or diseased branches (but seal wounds >2” wide with pruning sealant).
- Fruit-bearing branches unless they’re crossing or diseased.
Can I trim fruit trees in summer?
Summer trimming is possible, but it’s riskier. Lightly remove only dead, diseased, or crossing branches to reduce stress. Heavy pruning in summer can expose trees to sunburn or pests. If you must trim, do it on a cool, cloudy day and water afterward. Best for: Shaping young trees or correcting minor issues.
Do I need professional help, or can I DIY?
DIY works for small trees or basic trimming! If your tree is large, mature, or has complex issues (like Dutch elm disease), hire an arborist. They’ll ensure proper cuts, disease prevention, and structural integrity. Budget tip: Start with tools like a pruning saw and sterilized shears—many homeowners handle 90% of trimming themselves!
How do I know if my cuts are healing correctly?
Healthy cuts should:
- Seal within weeks (forming a smooth, callused edge).
- Not ooze sap or show signs of rot/mold.
- Support new growth (buds or leaves) in spring.
Wrapping up and next steps
Trimming your fruit trees isn’t just about aesthetics—it’s the secret sauce for healthier, more productive trees year after year! 🌳 By mastering the right techniques, timing, and tools, you’ll boost fruit quality, prevent disease, and keep your orchard thriving.
Whether you’re a seasoned gardener or just starting, every precise cut brings you closer to a bountiful harvest.
Ready to roll up your sleeves? Grab your pruners and start today! If you’re new to pruning, bookmark this guide and practice on a small branch first. For advanced gardeners, experiment with shaping techniques to create the perfect canopy. Your fruit trees—and future harvests—will thank you!